Component vs. Composite Video
Most modern gaming consoles connect to your TV through an HDMI cable, but with older gaming consoles the connection is different. Connecting your old gaming console requires a connection either through component or a composite cable. While their function is similar, there are a few key differences to note between composite and component. 
A component cable has five connectors that are responsible for transmitting the video and audio signal from the source device to the TV. Three connectors transmit the video signal while the other two carry the audio signal. These connectors are usually color-coded to allow for an easy install. The connectors responsible for the video feed are usually colored red, blue, and green, while the audio connectors are colored red and white. A component connection can display an image at 1080p or higher depending on the media source. A composite cable is a slightly older technology that was used in older TVs. This type of adapter only has three connectors, one yellow cable that is responsible for the video transmission and two connectors responsible for the audio (usually colored red and white). Because it is only able to deliver images in a linear connection, the resolution is usually only at 480i. A component connection is the preferred option to connect your gaming console as it provides better picture quality. Consoles like the PlayStation 2 and the original Xbox have component cable technology. Though if you want to use your older gaming consoles (we are talking vintage here!), then you will most likely need a composite cable. For example, the Nintendo 64, Super Nintendo, and Dreamcast systems can all be connected to your modern HDTV via a composite cable. We’ll take connecting a Super Nintendo system as an example. On the side of the Super Nintendo system, there are two connection ports for the video and audio connection, yellow for video and red for audio. Take your composite cable and connect the yellow video cable into the matching yellow video port on the system and connect the red audio cable into the corresponding red audio port on the console. Next, you need to connect the cable to your TV. On the back of your TV, you should see a yellow video port and a red audio port. Simply connect the other end of the composite cable into the matching ports, and you’re connected. Select the right input from the menu on your TV, usually the TV/Cable input, and you should be good to go. One thing to note: Depending on your TV, you may need a composite adapter in order to connect the cables to the TV. For more information, MakeUseOf provides excellent tutorial videos for connecting vintage gaming consoles to your TV.
Coaxial Cables
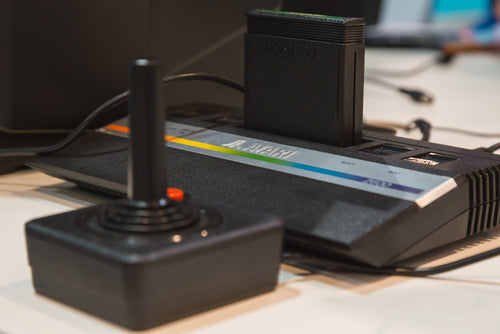
Some vintage video systems require additional components in order to work on modern TVs. For example, if you wish to connect your old Atari gaming console, like the Atari 2600, 5200, and 7800, or your Sega Genesis, you’ll need to follow this method. What you’ll need is a coaxial to RCA adapter, RCA cable, and the gaming console’s power cord. We’ll provide an example of how to connect an Atari 2600, but this method can be followed for other vintage gaming consoles that can’t immediately connect to your HDTV. To start, make sure your gaming console is plugged into the power source. Then take the RCA cable that came with the console, and connect the RCA connector to the RCA end of the adapter. Next, connect the coaxial end into the coaxial port of the TV. Make sure you have selected the right input—you may need to auto tune your TV for this—and you are ready to play. You can usually find the auto tune option in the settings area of your TV menu.


